What you'll learn
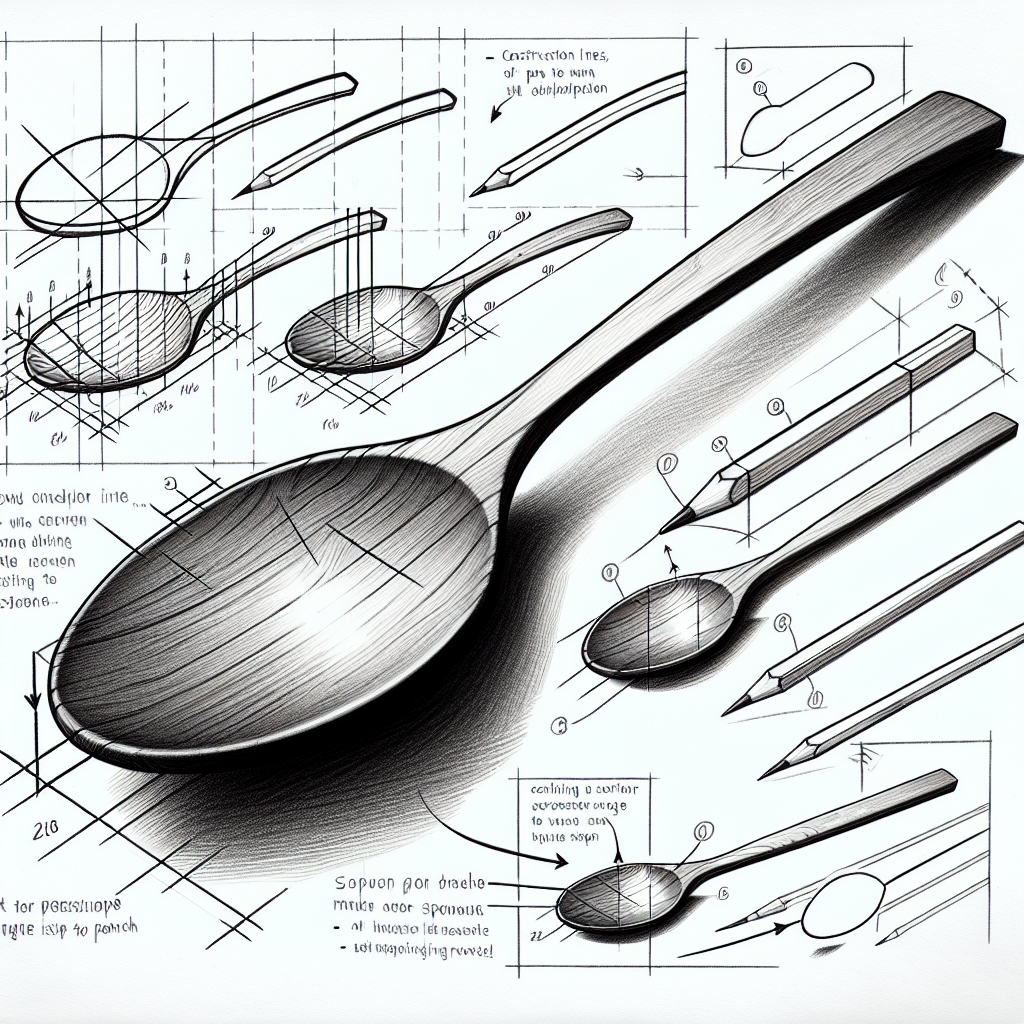
A wooden spoon offers a variety of textures from the smooth surface of the bowl to the grainy handle, making it a great subject for practicing texture. Hatching techniques will help depict the wood grain realistically.
What you'll need
Step-by-step: how to draw wooden spoon
Start by lightly sketching the basic shape of the wooden spoon, focusing on proportions.
Identify the areas where light and shadow fall, marking them lightly.
Using hatching, begin to render the grain pattern on the handle, varying line weight and spacing to show texture.
Move to the bowl of the spoon, using finer hatching lines to depict the smoother surface.
Refine shadows and highlights by adjusting line density, enhancing the overall three-dimensional effect.
Pro tips for drawing wooden spoon
Self-evaluation checklist
Assess if the wood grain pattern is convincing by checking if the texture suggests both the grain direction and surface unevenness. The spoon's form should appear three-dimensional and consistent with the light source.
Frequently asked questions
How long does this drawing exercise take?
The full wooden spoon exercise is designed to fit in about 15 minutes of focused practice — one of the reasons it works as a daily habit.
Do I need any prior drawing experience?
No. This lesson is aimed at intermediate artists and assumes only a pencil, paper, and willingness to observe.
What skill does this lesson target?
The focus is texture. Repeating similar exercises over time is how this skill becomes second nature.
More drawing lessons


Get a new drawing lesson delivered to your inbox every morning — free.
Subscribe to Draw Daily →